Sunday 20 March 2011

Mango Cheesecake With Strawberries or Raspberries

This is a perfect summertime cake, especially with fresh strawberries. For the raspberry top you can use frozen raspberries.

Base
150 g chocolate chip cookies
50 g butter

Topping
4 gelatin leaves (à 2 g, which makes 8 g gelatin)
3 tbsp lemon juice
300 ml cream
200 g cream cheese
250 g puréed mango (use readymade purée or canned mango)
4 tbsp granulated sugar

Crush the cookies with a knife. Melt the butter and mix it with the cookie crush.

Prepare a round (24 cm diameter) baking tin: cut a circle from parchment paper using the base of the tin, and place it on the bottom.

Spread the base into the tin and onto the paper.

Soak the gelatin in cold water for 10 minutes. Whip the cream. Mix the puréed mango, cream cheese and sugar so that the mixture is nice and smooth. Add the whipped cream and stir carefully. Taste it! Because some mango purées are less sweet than others, you might want to add sugar. The amount of sugar mentioned in the recipe is good for purée made of canned mangos in syrup.

Heat the lemon juice in a small saucepan. Stir in the gelatin and let it dissolve. Let cool for 5 minutes. Pour the liquid into the topping mixture, stirring the topping as you do so.

Pour the topping onto the base. Try to even out the top. Let it settle in the refrigerator for at least 4 hours.

Now you can add the berries of your liking:


For this version you need 1 litre fresh strawberries cut into slices and placed neatly on top of the cake.  Pretty and yummy, and ready to be served.

But personally I like raspberries more, and find the combination of raspberries and mango just perfect.


For this version you need 300 g raspberries, 100 ml water (or juice from the raspberries), 3 tbsp sugar and 2 gelatin leaves (4 g gelatin). Let the gelatin soak in cold water for 10 minutes. Heat the water in a pan and mix in the gelatin. Mix in sugar and let it dissolve. Let the liquid cool down a bit. Place the strawberries on the cake. Pour the cooled-down liquid on the berries. Let the top settle in the fridge for a couple of hours.

Friday 11 March 2011

Chocolate And Orange Cake


This time I'm only posting pictures for fun and for inspiration because the recipe uses ingredients that can only be found in Finland. However, I will probably, at some point, modify this cake so that it will become more universal.


Between layers of chocolate cake there was orange–apricot quark, cream cheese and lemon curd. The cake was topped with chocolate, orange wedges and yellow whipped cream, and decorated with dark chocolate butterflies.

Sunday 27 February 2011

The Art Of Making Pulla


 Pulla is a sort of Finnish sweet bread (cardamom bread). It's quite easy to make when you know the tricks of the trade. You can make the basic pulla dough into irresistible cinnamon rolls or the very sinful 
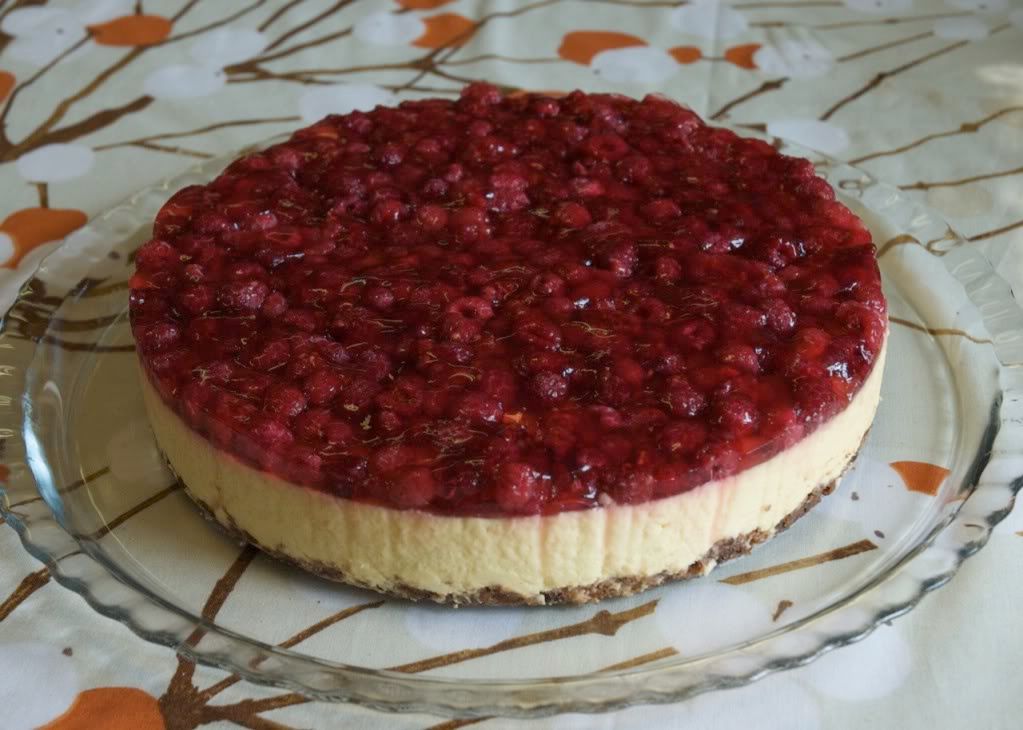
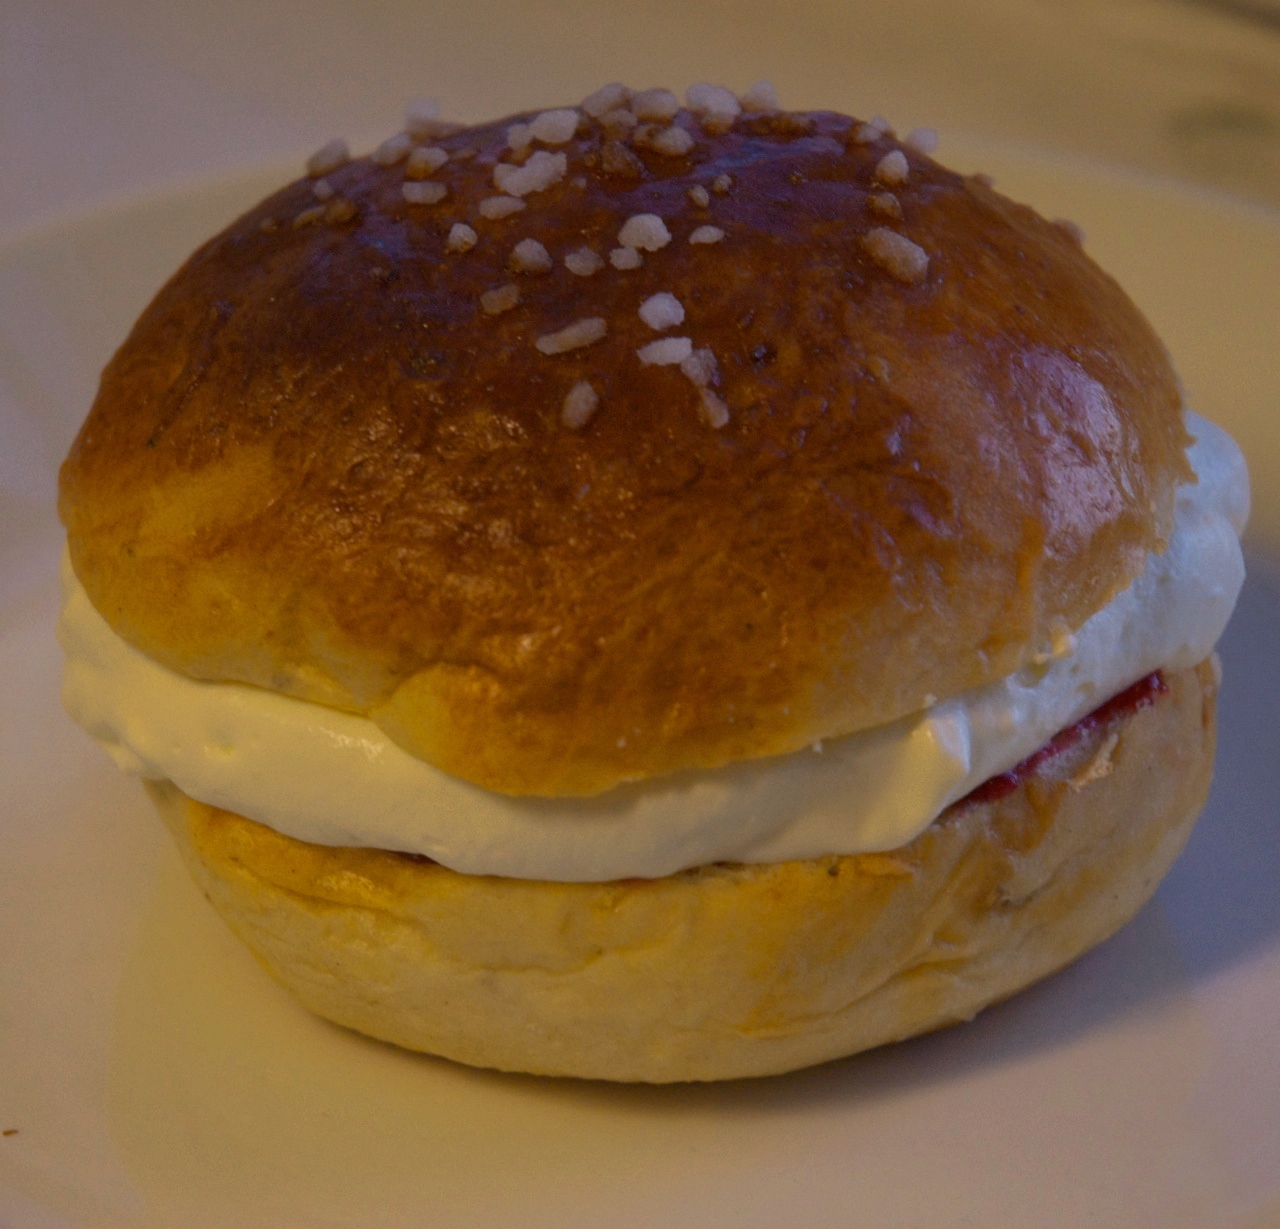
laskiaispulla (shrovetide bun) with whipped cream and jam/almond paste.

How not to fail:
1. Use fresh yeast, it's just way better.

2. Knead the dough properly because the kneading creates the structure/texture of the dough. I'm serious,  knead it like you mean it! I have never heard of too much kneading, so to be safe knead the dough at least 15–20 minutes. I prefer to knead by hand because that way I have a sense of dough all the way – I just feel it when it's ready.

3. There is no such thing as pulla light. Period. Use real butter. Also do not reduce the amount of sugar because the yeast will eat part of it and turn the initially quite sweet dough noticeably less sweet. The liquid component of the dough can be water or milk, doesn't really matter that much.

4. Be careful not to add too much flour. If there is too little flour in the dough, it will be a bit difficult to handle, but if there is too much, it will be ruined! I never measure my flour because I know what I'm doing. But if you're uncertain, start with the least amount mentioned in the recipe. Do not be alarmed if the dough is very sticky at first. When you keep on kneading it, it will start to come off of your hands – that's a signal that the dough is well kneaded.

5. Let the buns rise properly before baking. This will prevent cracking. This is just an aesthetic concern for cracked buns taste as good as their more beautiful counterparts.

Cinnamon rolls

For the dough:
(makes 25 cinnamon rolls or 16 laskiaispulla)

5 dl milk of water
50 g fresh yeast (for cinnamon rolls 25 g is enough)
1 egg
2 dl granulated sugar
1 tbsp crushed cardamom seeds
13–15 dl wheat flour (a variety that is suitable for baking buns)
150–200 g butter (room temperature)

You need a big cooking pot or a bowl (preferably metal) because the dough will rise and at least double in size.

Heat the liquid into 37 °C (body temperature). Do not overheat because the yeast cannot survive in a warmer environment and will die. Crumble the yeast and mix it into the liquid with a wooden fork (or some such thingie), stir until it has dissolved. Mix in the egg, sugar and cardamom.

Start stirring in the flour. When the mixture is too heavy to be mixed with the wooden fork, start using your hand. Knead and keep adding the flour. Once you've added all the flour and the mixture has an even consistency, you can knead in the butter. Knead the dough for 15–20 minutes. It will be smooth and elastic and will be easier to get off your hand when it's done.

Let the dough rise in a warm place for about 40 minutes.

Knead the risen dough lightly to remove air bubbles. Now you can make it into your desired type of pulla.

For cinnamon rolls:
ca. 100 g sugar
granulated sugar
cinnamon powder

1 egg to be spread on the buns before baking
nib sugar to decorate

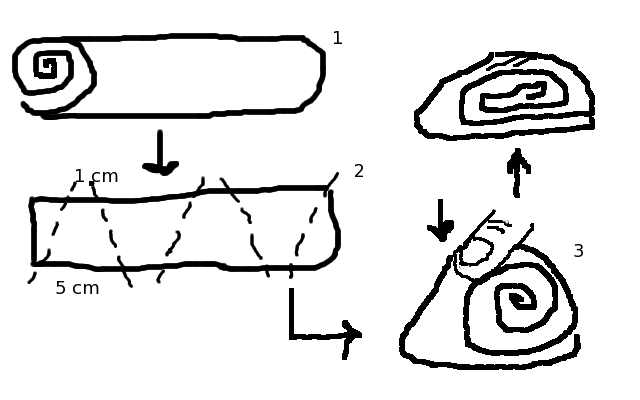
Divide the dough into three. Roll the dough into 30 x 60 cm rectangles. Spread a thin layer of butter onto the rectangle, then sprinkle a generous amount of sugar and cinnamon onto it. Roll the rectangle like a Swiss roll starting from the wider end (as shown in the picture, 1).

Cut the roll as shown in the picture (2). Place the roughly pyramid shaped buns on the baking sheet lined with parchment paper, wider side down. Press the buns into shape with your fingers (3); you should press quite hard for the dough to be attached properly. Don't be alarmed if your rolls don't turn out as pretty as mine – it takes practice to get the shape right.


Let the rolls rise in a warm place for about 30 minutes. Spread the slightly beaten egg on the rolls with a pastry brush. Sprinkle nib sugar to decorate. Bake in the oven in 225 °C for 10–15 minutes. Remember to watch the buns closely at the end to avoid overbaking/burning them.


For laskiaispulla:
nib sugar or almond flakes to decorate
whipped cream
almond paste and/or raspberry jam
(a little milk)

Make the dough into big round buns. Let rise properly before baking. Before baking, spread the egg wash and decorate with nib sugar or almond flakes. Bake for 15 minutes (same temp. as with the cinnamon rolls).


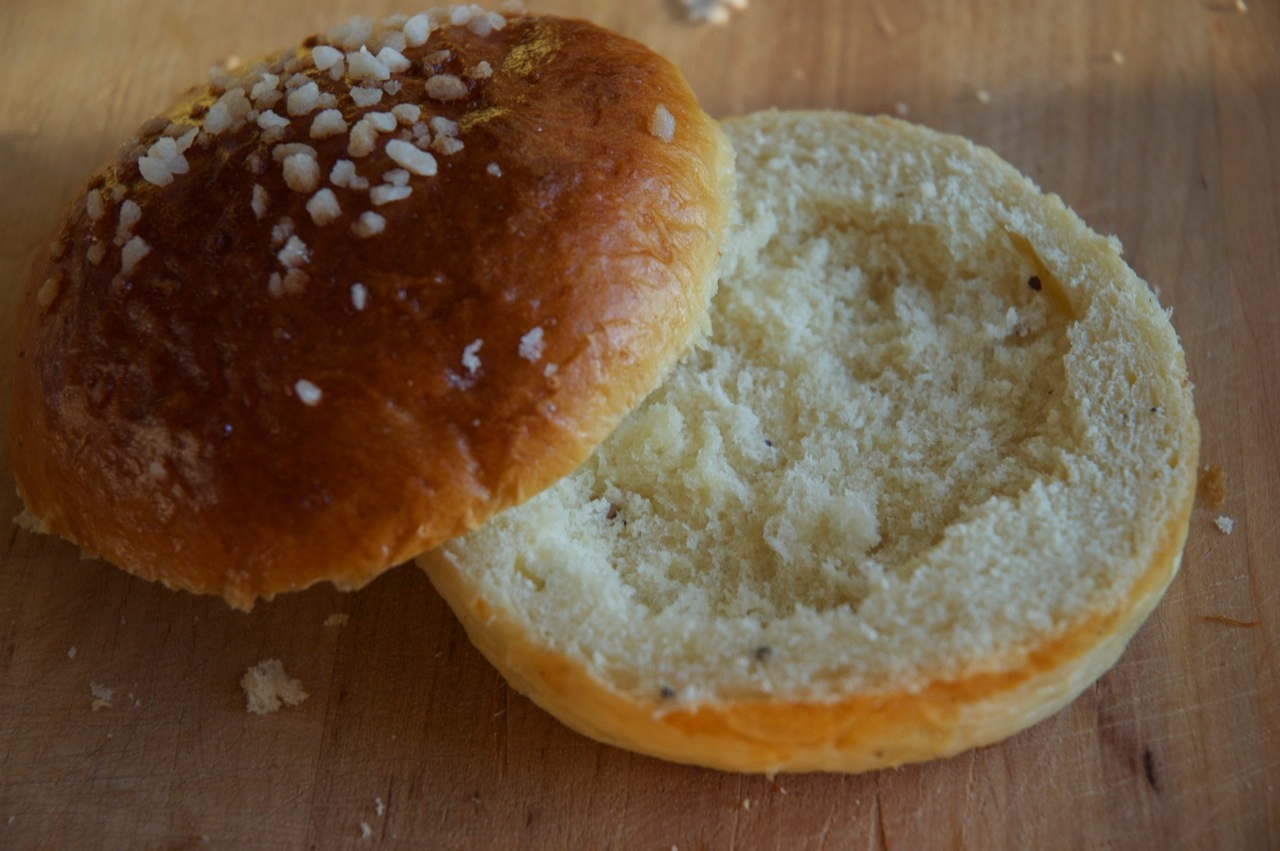
When the buns have cooled down, cut them in half. Carve out some of the dough as shown in the photo.


If you are going to fill these beauties with almond paste, mix the carved-out dough with the paste and soften it with a little milk (or water). It will look like porridge but taste good.


Fill the hollow space with this porridge or jam, if that's what you prefer, and put a blob of whipped cream between the bun halves. Put in too much cream and your face will be covered in it while eating the bun. But that's how it should be. 


Mmm... kind of looks like a hamburger... with whipped cream.

Warning: Do not eat more than two laskiaispulla in one sitting! Three or more will result in OD and the quite uncomfortable feeling of having eaten too much pulla and whipped cream. Been there, done that...

Wednesday 16 February 2011

Experimenting with molecular gastronomy: chocolate chantilly with beer

I have only recently started experimenting with chocolate but so far I have found it quite enjoyable to tackle with this fickle substance that tends to drive you nuts by crystallizing into the wrong form (see Wikipedia on tempering). I ran into chocolate chantilly - which is essentially chocolate mousse without cream or eggs – in a Finnish molecular gastronomy blog (link), and immediately found the concept interesting.

The idea of a chantilly is to dilute a fatty emulsion (in this case, molten chocolate) so that the fat content is the same as that of cream (37 %). One possible problem with chocolate is the uncontrolled crystallization of the cocoa butter that may result in a grainy and unappealing texture. This can be avoided with tempering. The recipe I used did produce a perfect result in this sense: I managed to get a nice and smooth chocolate mixture. However, I encountered another problem which was, to my belief, due to a too low a fat content of the emulsion (too little chocolate, too much beer): the chantilly didn't turn into a mousse but resembled a thick sauce. For a while I thought about how to fix it and decided to try a radical solution – adding some (odourless) oil into the mixture. And surprisingly enough, it actually worked! The sauce turned into a beautiful mousse! The quantity of the oil was so small – about one teaspoonful – that it didn't affect the taste in any negative way. If you need to fix the thickness, pour the oil in slowly while whipping the chocolate–beer emulsion with the electric mixer.


My verdict
The experiment was a success because:
– the recipe actually worked,
– I successfully repaired it when it wasn't quite what I wanted (adding the oil),
– the texture was wonderful.

It was not a success because
– my husband didn't appreciate the taste. However, I didn't use porter as was mentioned in the original recipe but Innis&Gunn Oak Aged Beer which I have drank with chocolate and thought, therefore, to be suitable.

Well, I have to admit that I did enjoy the combination of dark chocolate and beer in some weird way. However, I still think that some other combos might work better (take, for example, Fooducation.org's Earl Grey and milk chocolate chantilly). I have noticed that mixing chocolate and alcohol works better in theory than in practice, so I think I'll avoid that in the future. I do find the idea of chocolate chantilly very appealing, so this won't be the last of it, I'm sure!

***
Warning: Making this will result in a very messy kitchen. Both your kitchen and you will be covered in chocolate spatters before the mousse is ready.

You need:
75 g dark chocolate
1 dl porter (or other beer that you think would go well with chocolate)
0,5 g gelatin leaf (soak in cold water for a while)
(some tasteless oil, e.g. rapeseed oil, just in case)

3 litre (or so) pan
bowl (can be plastic)
electric mixer
food thermometre

1. Melt the chocolate in the microwave oven (carefully, don't burn it!).
2. Heat the beer into 60 °C and add the gelatin leaf, let the gelatin dissolve.
3. Make a hot water bath: put some hot water into the pan and then place the bowl onto the water. Start your mixer and start whisking the beer. Pour the chocolate slowly into the bowl while whisking. (Aaagh, the spatters!)
4. When all the chocolate is in, remove the bowl from the hot water and continue whisking. Start measuring the temperature.
5. When the temperature reaches 24 °C the chocolate crystallizes and the mixture will start solidifying fast.
6. Put the bowl back on the hot water and continue whisking until the temperature reaches 28 °C.
7. Move the bowl onto a cool surface and continue whisking until the mixture resembles soft whipped cream. If the mixture stays liquid despite all the mixing, add some oil (a teaspoonful at a time) to fix the fat content, and you should have a mousse. If the taste isn't sweet enough, you can mix in a little bit of powdered sugar.

Saturday 12 February 2011

Some Old Cakes

I didn't document the making of these cakes because I simply didn't have the time. And also didn't expect to start writing a baking blog, back then. You still might enjoy the odd photograph and recipe. 


Wedding Cakes

I'm a bit of a megalomaniac. So I took on the rather nerve-wracking task of making my own wedding cakes. Overall, it was a success (tasted great) but there were naturally a few things to improve (aesthetically). There were 90 guests, and they managed to eat almost all the cakes in spite of my calculations that those cakes should have served approximately 120 people. 

I frosted and decorated the layer cakes and baked the cheesecakes in the course of two days preceding the wedding. I had made the decorations and baked the chocolate cakes well in advance (the chocolate cake can be frozen). I also had help, but it was nonetheless a lot of work and a very sweaty task because it was +25 °C outside – very unusual for mid-May in Finland. I do blame the weather a bit for the slight lopsidedness of the 3-tier cake.

Wedding cake photos by Eveliina Mustonen, other photos are mine.


I made one big three-tiered chocolate layer cake and two smaller one-tiered ones with a mascarpone/cream cheese-lime-raspberry-Daim dragees frosting. The cakes were covered with marzipan and decorated with sugar paste lilies and butterflies. The decorations were completely edible. I also made a few (six in total) passion fruit cheesecakes (recipe forthcoming). 


And here we are cutting the cake. I actually asked my husband whether he would like to have his own piece. >.< 'Cause eating a single piece of cake together is so inconvenient! On the left you can see one of the smaller cakes and on the right one of the cheesecakes. 


My Birthday Cake & My Sister's Graduation Cake – Same Contents, Different Decorations

Chocolate Cake

4 eggs
2 dl granulated sugar
200 g butter
200 g dark chocolate
2 1/2 dl wheat flour
1 tsp (=5 ml) baking powder


Butter a round baking tin (∅ 24 cm), and set the oven to 175 °C.

Whisk the eggs and sugar with an electric mixer until the foam is white, smooth and firm. Melt the butter and dark chocolate in a pan. Remember to stir it constantly, and don't burn the chocolate! Combine the (sieved) flour and baking powder in a separate bowl. Add some of the flour into the egg-sugar foam and mix carefully; then add some of the butter-chocolate mixture and stir; then some flour, then some chocolate, and so on until you have added all the flour and the butter-chocolate mixture into the egg-sugar foam. Check that your cake batter is evenly mixed. Then pour it into the baking tin and bake for 50 minutes on the lowest rack. 

Let the cake cool for a moment in its tin, then turn it over. Let it cool properly (better refrigerate it) before cutting it into layers and adding the frosting. The cake can be frozen.


White chocolate-Cloudberry-Daim dragees Frosting

1 bag (100 g) Daim dragees
4 dl cream
200 g plain cream cheese or mascarpone
200 g white chocolate
1 litre cloudberries (or a big jar of cloudberry jam)

Note: Outside Finland and Sweden Daim dragees (you can also use crushed Daim bars) can be bought at least in Ikea stores. Cloudberries might be difficult to come by outside the Nordic Countries, so you can use other berries instead (e.g. raspberries, currants, blueberries). 

Melt the white chocolate in the microwave oven. Use the lowest power setting and melt the chocolate in 30–60 second bursts, stir the chocolate every once in a while. Let the chocolate cool down into approx. room temperature – letting the chocolate cool down is important because it will otherwise curdle the cream. Whip the cream and mix in the cream cheese. Mix in the melted chocolate and the Daim dragees. 

Moisten the layers of cake with milk. Spread half of the frosting on the bottom layer, and put half of the berries on top of the frosting. Put the middle layer on top of that. Spread the rest of the frosting and add the rest of the berries and put on the top layer. Refrigerate to let the frosting set. 


To decorate

If you cover the cake with marzipan, you must spread a thin layer of buttercream between the cake and the marzipan in order to keep the marzipan from "sweating". This is an easy-to-make fast buttercream:

125 butter of margarine
1/2 tsp vanilla sugar
250 g powder sugar
1 tbsp water

Soften the butter with an electric mixer. Mix in the powder sugar and vanilla sugar until creamy. Finally, add the water and mix thoroughly. 

For my b-day cake I wanted something different, so I decided to make a Half-Life themed cake with a crowbar, a logo and a headcrab. I had been playing the game quite a bit during that spring. I made the above mentioned decorations from marzipan and painted them with food coloring. I also made some sugar paste flowers and butterflies.


For my sister's graduation cake I made sugar paste lilies with noodle stamens. I covered the cake with marzipan colored with cocoa powder (=chocolate marzipan).